Using Print to vMedia
To activate Print to vMedia, print the
desired content from the application to the vMedia printer. For
most Windows based applications, this can be accomplished by
choosing File>Print... from the application’s menu.
For example, from Internet Explorer:
-
Select File>Print...
-
If the vMedia printer object is not the default
printer, select it from the drop-down list.
-
Click [OK].
NOTE: After a brief time,
the application will finish sending all of the pages to the Windows
print spooler.
After the document has been spooled, the vMedia
printer object will create the page images and bring up the Data
Entry window:

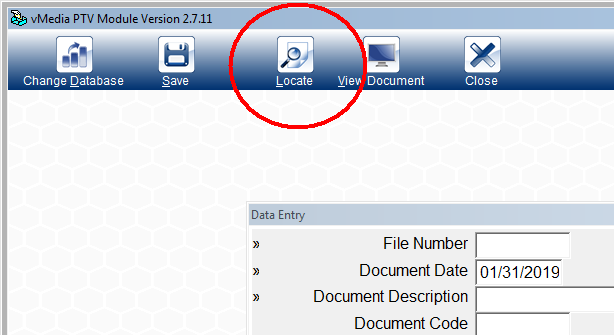
The Data Entry window is used to enter index
field values for filing the document.
[Change
Database] - Selects a different database in which to file the
document.
[Save] - Files the document in the database.
[Locate] - The Locate (Search)
function (see below section) performs similarly to the Locate
function in the vMedia
Scanning Module.
[View Document] - Displays the unsaved document as it will
appear once it is filed in the database.
[Close] - Deletes the unsaved document without adding
it.
A confirmation prompt will appear before closing
the unsaved document.

The Locate (Search) function
- abbreviated usage steps:
- Only the FFF/document uniqueness fields participate (as
indicated by the chevron symbol in the left column of the field
description). Non-FFF fields in the DES are ignored.
- All non-empty FFF fields participate in the search. Since many
fields may default to non-blank values (such as Document Date),
those fields will need to be cleared or contain a valid search
value. Date fields are considered empty even though the separator
slashes will still be displayed.
- If all FFF fields are empty then the standard "Search Scope
Confirmation" will be displayed to confirm that the user intends to
return ALL documents.
- After filling in the appropriate FFF fields, click
[Locate]. The Search Mode Selection dialog will be
displayed:
- Standard - Left to right search in all non-empty FFF
fields. Case sensitive for DBF back-end only.
- Extended - Containing search (case blind for DBF and
SQL).
- Last Saved Document - If this is the first document
being saved by the user in this PTV session (which is defined as
the startup of PTV after the configured maximum PTV idle time has
elapsed), then the Last Saved Document will be unavailable. If a
prior PTV has been performed and the idle timeout has not expired,
the [Last Saved Document] button will be available. If
chosen, no search is performed. Rather the Last Saved Document is
loaded into the entry screen as the selected document or media
object. This is a useful shortcut when multiple PTV requests are
targeting the same document (typically to add pages).
- Once Standard or Extended is selected, a search
is performed. If no documents match the search criteria, a
non-matching dialog will be displayed. Click [OK] to
acknowledge this outcome. No selection will be made. If there is,
an existing document will remain selected and no entry fields will
be updated.
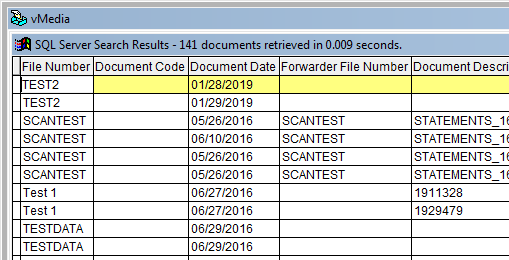
- If one or more filed media objects match, the selection grid
will be displayed.

Note the visual change to the selection bar colors. There is now
black text on a yellow background (except for the selected cell,
which remains black text with white for technical reasons).
Related Topics
Print to vMedia
Introduction
|


