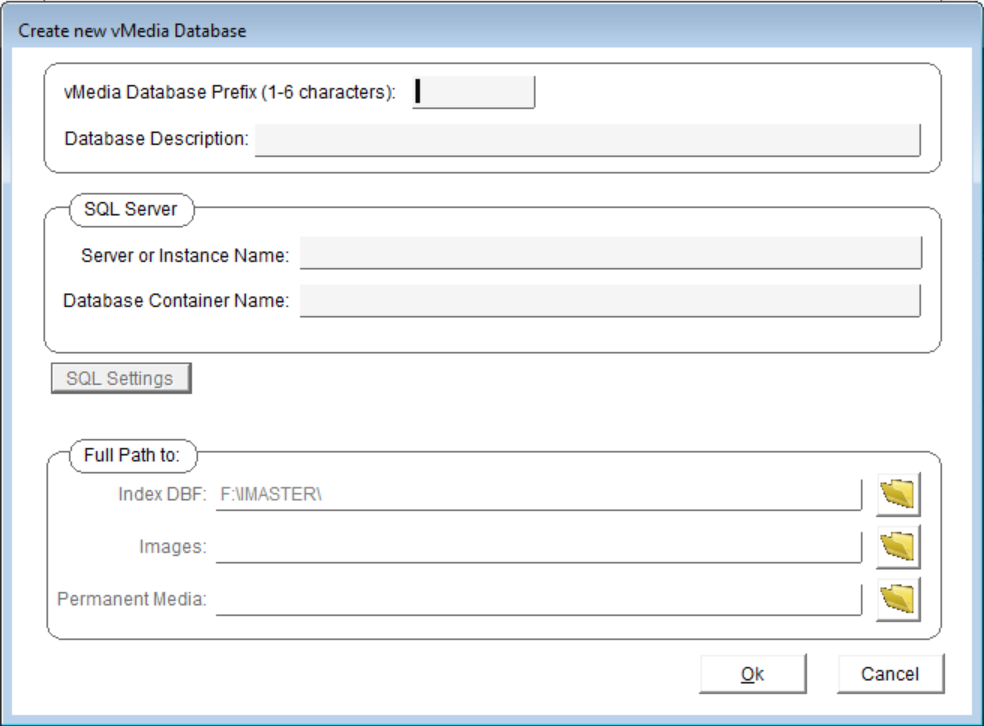
1. At the Master Control window, click the [DB Config] icon.
2. Click the [New Database] button. The New
Configuration Database dialog box opens, displaying a default
Filename and Directory.
3. Enter the database prefix. It can be up to six characters
long. If more than six characters are entered, the prefix will be
truncated to the first six. If fewer than six characters are
entered, the name will be extended to six characters by padding
with zeros. The proper file designator cf and sc will
automatically be added to the name prior to file creation. The
extension .dbf will automatically be assigned by vMedia.
*Note: The database prefix MUST match the Q-LawE database name
(typically QLAWPR for production environment or QLAWTE for test
environments). If you are unsure what the database name is it can
be found in the upper left corner of the Q-LawE application when
you log in.

4. Enter +QLAW for the Server or Instance Name.
5. The SQL Settings button will take you to a SQL Settings Screen which will allow you to manage the Q-LawE connection.
6. Click the [SQL Settings] button.
7. Locate and select the Prefs.dbf file for your Q-LawE
installation and click the [Select] button.

8. Accept the settings by clicking on the [OK] button.

9. For the Full Path locations, accept the defaults or browse
for your desired paths.

10. To create the image database and return to the New
Configuration Database dialog box click [OK].
The Configurator displays the new image database.