Alternate Method for 2D Barcode Generation with WordPerfect and
the Collection-Master Merge
In order for WordPerfect to be able to generate a DataMatrix 2D
barcode, helper software in the form of the vMedia 2D barcode
module must be linked into the merge form and the appropriate
information to be encoded must be specified.
There is a long standing limitation in the 2D DataMatrix engine
in WordPerfect (actually a limitation in the WP Merge) whereby
Merge variables are limited in length to 127 characters. To
overcome this limitation, which affects the ASSIGN merge command,
an alternate strategy for creating the 2D barcode was developed
that avoids the WP Merge variable.
See "Format Documents for
DataMatrix 2D Barcode Recognition Type" for the primary method
of barcode creation.
Avoiding the Merge Variable Limitation for Configuring
DataMatrix 2D Barcodes:
- Open an existing or new WordPerfect merge form.
- Insert a text box (Insert>Text Box).
- Select the text box and right click to bring up the context
menu and then choose Position.
- In the Box Position dialog box, attach the text box to
the Page and click [OK].
NOTE: The size and
position of the barcode on the page can be precisely controlled and
the barcode can be placed anywhere on the page, including in the
margins or in the header and footer area without disturbing the
underlying form layout.
- Reposition the text box to your desired barcode location. (The
top-left corner of the text box will coincide with the top-left
corner of the barcode.)
- Select the text box and right click to bring up the context
menu and then choose Border/Fill.
- In the Box Border/Fill dialog box, on the Border tab,
click the [Discontinue] button to remove the borders.
NOTE: Information in the
barcode can either be hardcoded as a static text string or pulled
from Collection-Master fields.
NOTE: The barcode could
grow to be quite large, depending on the amount of information in
the barcode.
- Place the merge commands inside the borderless text box. (It
does not matter if the entire text is visible. You can expand the
text box for ease of editing and then reduce it's size for the
barcode placement/location.)
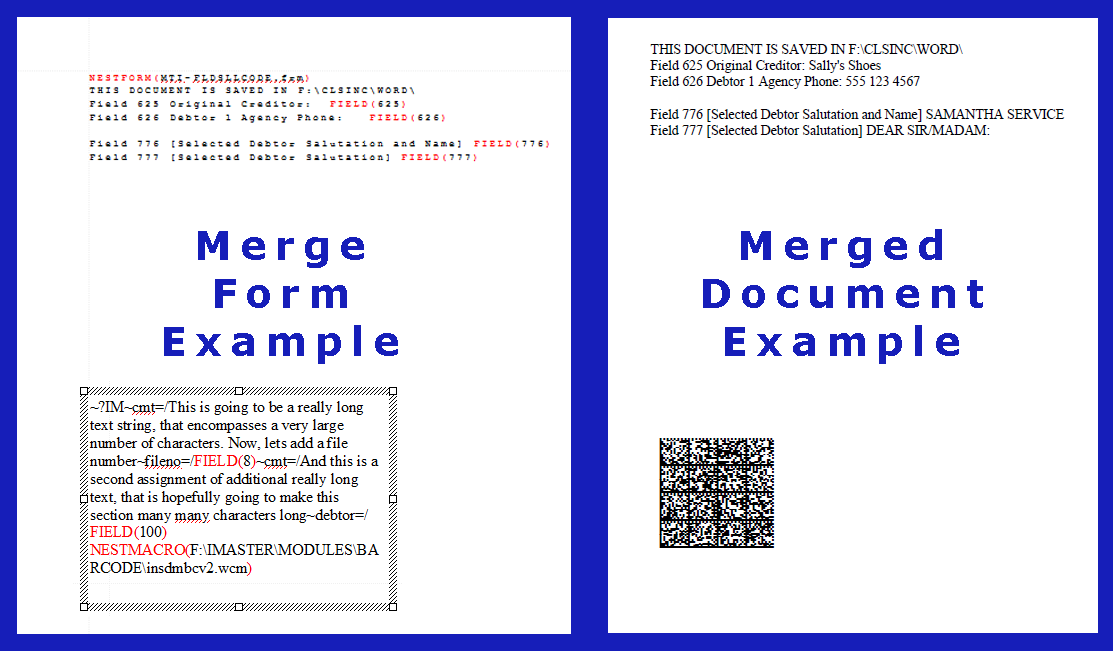
Example:
~?IM~cmt=/This is going to be a really long text string, that
encompasses a very large number of characters. Now, lets add a file
number~fileno=/YGC00005~cmt=/And this is a second assignment of
additional really long text. Wonder what happens~debtor=/Samantha
Service
- Enlarge or reduce the text box in the template as needed to
accommodate the increased barcode size.
- Insert a WordPerfect NESTMACRO merge command immediately after
the text in the text box.
a. From the Merge Toolbar select Insert Merge Code, then
More . . .,
b. Highlight NESTMACRO in the Insert Merge Codes
dialog box, and select Insert.)
- In the Enter Macro Name field, type or click the folder
icon and navigate to the following file:
x:\IMASTER\MODULES\BARCODE\InsDMBcv2.wcm where x: is the drive
letter where vMedia is installed.
- Click [OK] to complete adding the NESTFORM command.
- Save and close the document.
NOTE: In the following
graphic, the NESTMACRO points to an IMASTER folder; however,
depending on how vMedia is set up, it may have to point to a vMedia
folder.
Related Topics
Barcoded Forms Introduction
Format Documents for
DataMatrix 2D Barcode Recognition Type
|